Restoration Process and Care: The Complete Guide
Restoration process and care — The Complete Guide: Most restoration jobs need a source fix, drying, and careful inspection before repair; if the damage is…
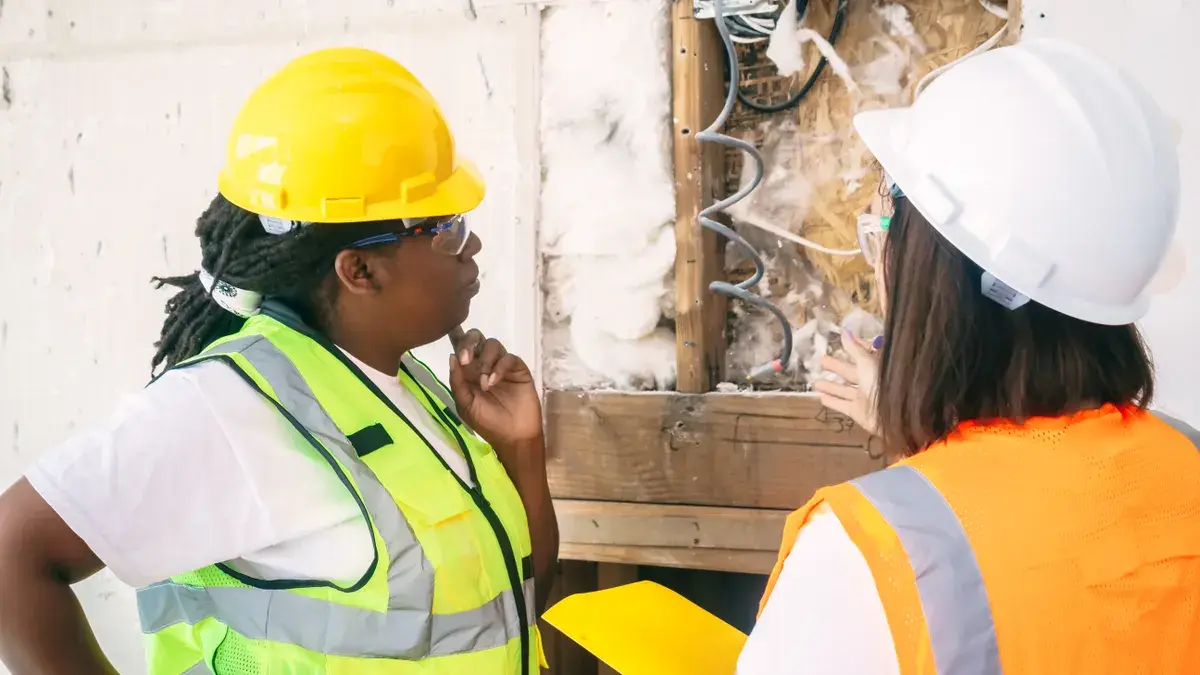
Inspectors examining damaged wall framing
Last updated: November 12, 2026
Quick answer: Most restoration jobs need a source fix, drying, and careful inspection before repair; if the damage is wet, contaminated, or structurally weak, consult a professional. In this guide to Restoration Process and Care: The Complete Guide, you’ll see how to choose the right steps, when to stop, and how to keep the problem from coming back.
Key Takeaways
- Restoration starts by stopping damage, then cleaning, drying, repairing, and protecting so the problem does not return.
- Hard, non-porous, structurally sound materials are often restorable; saturated insulation, crumbling drywall, and warped particleboard often are not.
- The right answer depends on source, material, time, and extent—not just how bad it looks.
- Microbial, smoke-based, and structural damage each call for a different restoration plan.
What the restoration process actually has to do
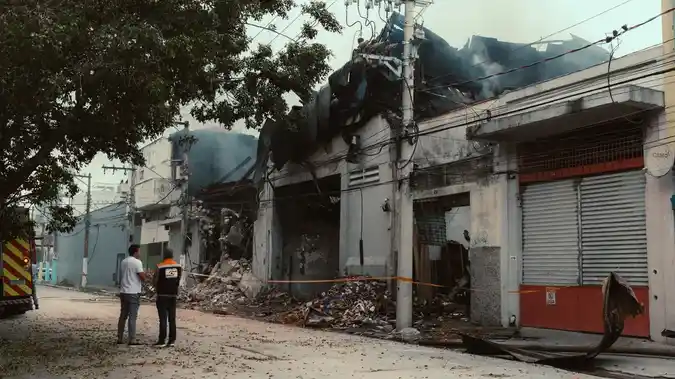
Restoration has to stop the damage first, then clean, dry, repair, and protect the item or space so it doesn’t fail again. If you only make it look better, the problem often comes back inside 24 to 72 hours as mold, swelling, rust, or stain bleed.
Picture this: you’re staring at a soaked floor, a smoke-stained wall, or a piece of furniture that looks fine on top but smells off underneath. The real job is not “make it pretty.” It’s to remove the source, bring moisture down, and decide what can be saved without making things worse.
Because of that, if you’re dealing with water, smoke, or surface damage, the order matters:
- Stop the source.
- Photograph the damage before moving anything.
- Separate salvageable items from soft goods that hold contamination.
- Dry the affected area with air movement and dehumidification.
- Clean with the right method for the material.
- Repair only after moisture or residue is actually under control.
That last step gets skipped all the time. Big mistake, unless you confirm the material is dry and stable first or consult a professional when the condition is unclear.
For water-damaged materials, the big fork is porous vs. non-porous. Drywall, insulation, carpet pad, and unfinished wood absorb and hold contamination; tile, glass, sealed metal, and many plastics can often be cleaned. A piece that still smells musty after drying usually needs a deeper check, not just perfume or paint.
Quick check: If the damage is still wet, soft, or smells sour, you are in the containment-and-drying stage, not the repair stage.
How do I know what can be restored and what has to go?
You can usually restore hard, non-porous, and structurally sound materials, but saturated insulation, crumbling drywall, and warped particleboard often need replacement. The decision changes fast when the damage is from sewage, fire residue, or mold growth over 10 square feet or more, where professional rules often come into play.
Here’s the catch: “Looks okay” is not the same as “is okay.” A wood cabinet can look normal and still hold moisture in a panel core. A couch can dry on the outside while the cushion stuffing stays wet for days. Once that happens, odor and microbial growth follow.
| Situation | Best Path | Why Other Options Fail |
|---|---|---|
| Clean water on sealed tile or metal | Dry, clean, inspect seams | Painting over it traps residue |
| Wet drywall with bubbling or sagging | Cut out and replace damaged sections | Drying alone leaves hidden damage |
| Wood with minor surface staining | Clean, dry, then sand or refinish if stable | Heavy sanding too early can spread contamination |
| Smoke on hard surfaces | HEPA vacuum, then dry chemical cleaning | Water alone can smear soot |
| Sewage contact on porous material | Remove and discard | Disinfection rarely reaches deep fibers |
If you’re not sure, use a simple rule: if the material is soft, swollen, or holds odor after 48 hours of drying, it is usually not a good restoration candidate. If the piece is valuable, move it out of the wet zone and get a specialist to assess it before you scrub.
A few questions help narrow it down:
- Did the damage touch food-prep surfaces?
- Is there visible mold, soot, or a sticky film?
- Has the item already warped, bubbled, or separated at the seams?
- Is the base material porous?
If the answer is yes to any of those, the safe path gets narrower.
Quick check: If the item is porous, warped, or contaminated by sewage or smoke, assume replacement or specialist treatment is more likely than simple cleaning; consult a professional if you are unsure.
What actually determines the right answer here
The right answer depends on source, material, time, and extent—not just how bad it looks. A small leak on sealed flooring is a different job from a slow leak behind a wall that ran for three days.
Picture this: you’ve got one room with a wet corner, and the rest of the place looks fine. The temptation is to dry the visible spot and call it done. That works only if the source was clean, stopped fast, and never got behind the surface.
The four things that change the plan:
- Source of damage. Clean water, gray water, sewage, smoke, or chemical residue each changes the cleanup.
- Material type. Painted drywall, hardwood, laminate, upholstery, plaster, and stone all react differently.
- Time exposed. A same-day leak is one thing; a leak sitting over a weekend is another.
- How far it spread. A small patch is manageable; a whole wall cavity is not.
If the source was clean water and you caught it quickly, then controlled drying and cleaning can save a lot. If the source was sewage, the material touched food or skin, or the damage sat long enough to soften the substrate, the answer flips toward removal and replacement.
The standards matter too. In building restoration, mold assessment and remediation are commonly guided by industry practices like the IICRC S500 for water damage and IICRC S520 for mold remediation. Those standards don’t mean every job needs a certification team, but they do show how the work is supposed to be sequenced: contain, dry, remove damaged material, then clean and verify. According to the EPA, fixing moisture problems quickly is essential to prevent mold growth.
For a homeowner, the practical version is simpler:
- Clean water + hard surface + quick response = often restorable
- Dirty water or sewage + porous material = usually not worth saving
- Smoke residue + electronics or fabrics = case-by-case, with caution
- Mold on structural materials = inspect, isolate, and don’t seal over it
What a careful restoration process looks like
- Shut off the source or isolate the area.
- Document the damage with photos and notes.
- Remove loose standing water with wet vacs or absorbent towels.
- Set air movers and a dehumidifier sized for the space.
- Open up hidden cavities only if moisture readings or visible damage point there.
- Clean the affected surfaces with the right method for the material.
- Check for lingering odor, warping, staining, or soft spots before closing the area back up.
That sequence matters because trapping moisture behind a new finish is how a “fixed” area fails later. The clean look is not the finish line. Dryness is.
Quick check: If the source, material, and time span are all still unclear, you need assessment first, not cosmetic repair.
The 3 conditions that change everything
The restoration plan changes completely when the damage is microbial, smoke-based, or structural. Those three categories look similar at first glance, but they fail in different ways and need different care.
Picture this: a wall smells musty, a ceiling has brown rings, or a cabinet has a charred edge. If you treat all three the same, you may waste time and spread the problem, so the goal is to match the cleanup to the residue and the substrate.
1) If mold is present or strongly suspected
If you see mold growth, then the main job is moisture control and removal of affected material that can’t be cleaned properly. Bleach is not a magic fix on porous surfaces. It can lighten staining, but it often does not solve what’s growing inside the material.
Use:
- moisture meters to find the wet zone
- containment to keep spores from spreading
- HEPA vacuuming for dust and loose contamination
- cleaning methods suited to the surface
- replacement for porous materials that are colonized or degraded
If the moldy area is large, hidden, or tied to a leak inside a wall or ceiling, the right move is to open the assembly and find the source. Painting over it is a delay tactic.
2) If smoke or soot is the problem
If the damage came from fire or smoke, then dry residue management matters more than water. Soot is greasy, fine, and easy to smear. Water can make some soot stains worse, especially on painted walls, upholstery, and textiles.
Use:
- dry soot sponges or HEPA vacuuming first
- alkaline or specialty cleaners for residue, if suitable
- separate cleaning for plastics, fabrics, and electronics
- odor control only after residue is removed
If the smoke reached insulation, ductwork, or soft furnishings, replacement may be cheaper and cleaner than endless scrubbing. For smoke-affected belongings, the IICRC S700 guidance is a useful reference point for fire and smoke restoration.
3) If the damage is structural
If the material has lost shape, strength, or adhesion, the answer changes. Warped particleboard, delaminated laminate, cracked plaster, and sagging subflooring are not just ugly; they can fail under load.
In those cases:
- check the structure beneath the surface
- remove anything that no longer sits flat or solid
- dry the assembly before repair
- only rebuild after the hidden layer is stable
A patch over a weak base won’t hold. It never does.
Quick check: If the problem is mold, soot, or loss of structure, the restoration plan needs a deeper inspection before any finish work.
If you’re doing the cleanup yourself, what steps matter most?
You can handle some restoration tasks yourself, but only if the damage is small, clean, and contained. If the area is bigger than a few square feet, involves sewage, or has hidden moisture, DIY care usually stops being smart.
Picture this: you’ve got gloves on, a fan running, and a bucket nearby. That setup is fine for a small spill on a hard surface. It is not enough for soaked drywall, contaminated carpet, or a wall cavity that stayed wet overnight.
Start with the basics:
- Gloves and eye protection if you’re handling contaminated surfaces
- HEPA vacuum for dust, soot, or dry debris
- Detergent and clean cloths for hard, washable surfaces
- Dehumidifier and fans for drying
- Moisture meter if you need to know whether a wall or floor is actually dry
A safe DIY path for small, clean damage
- Cut power to the area if water reached outlets, cords, or appliances.
- Remove standing water with towels or a wet vac.
- Pull up rugs, cushions, or objects that trap moisture.
- Run air movement across the affected area, not straight at one spot only.
- Use a dehumidifier until readings or touch tests show the material is dry.
- Clean the surface with a product that fits the material, then let it dry fully again.
- Watch for odor, staining, or soft spots over the next **48 hours**.
The trap is overconfidence. If you can smell mildew after the area looks dry, the job is not finished. If the material feels cool or damp in the middle of the day, it is not dry enough to close up.
There’s also a line you should not cross with DIY care:
- no repainting over damp drywall
- no sealing over active mold
- no reusing carpet pad after sewage
- no plugging electronics back in until they’ve been checked and dried properly
That last point matters. Water and power do not forgive shortcuts.
Quick check: If the damage is small, clean, and fully visible, DIY care may fit; if it is wet inside a wall or smells wrong after drying, it does not.
What care after restoration keeps the problem from coming back?
The best care after restoration is moisture control, gentle cleaning, and regular inspection, because most repeat failures start with missed water, trapped residue, or aggressive cleaning. A restored area can fail again in days if the hidden cause stays in place.
Here’s the catch: “care” is not just upkeep. It’s proof that the repair actually held. A fresh paint job, a cleaned sofa, or a repaired cabinet still needs checks because hidden moisture and lingering contamination show up late.
For restored building materials:
- keep indoor humidity in a normal range for the season
- inspect around sinks, tubs, windows, and HVAC condensate lines
- look for new stains, peeling paint, or soft spots
- clean spills fast before they soak in
- don’t block airflow against walls or under furniture for long periods
For restored furniture and soft goods:
- vacuum with a HEPA machine if dust or soot was part of the job
- avoid heavy fragrances that mask odor but leave residue
- keep fabrics dry and out of direct damp contact
- rotate cushions and open drawers or cabinet doors after a humid spell
- recheck seams, joints, and padding after a week
If a restored surface was sealed, painted, or refinished, the first 30 days matter most. That’s when trapped moisture often shows itself as blistering, cracking, or odor return. If you see that, don’t just touch up the finish. Find the cause.
Care mistakes that cause repeat damage
- using a surface cleaner on hidden water
- drying only what you can see
- putting furniture back too soon
- covering stains before they’re stable
- storing restored items in a damp basement or garage
The cleanest-looking repair can still be a bad repair. Care is the part that tells the truth.
Quick check: If the area is restored but still gets damp, smells off, or peels within a month, the real issue was never fixed.
Edge cases where the normal advice breaks down
Some situations do not fit the usual “clean, dry, repair” playbook. In those cases, the material, contamination, or access problem changes what good care looks like.
Picture this: you’re staring at a job that seems simple until you touch it. The surface may be small, but the failure mode is not.
| Situation | What changes | What to do instead |
|---|---|---|
| Antique wood or heirloom furniture | Finish layers and joinery can be fragile | Use minimal cleaning, low moisture, and a conservator-style approach |
| Electronics exposed to moisture | Corrosion can continue after drying | Unplug, keep off power, and get qualified inspection before reuse |
| Sewage on porous flooring | Contamination penetrates deep | Remove and discard the affected porous material |
| Fire-damaged fabrics | Soot and odor bind to fibers | Separate delicate items and use specialty textile care |
| Historic plaster or decorative trim | Aggressive cutting destroys original material | Stabilize first, then use the least invasive repair possible |
| Large hidden leaks behind walls | Damage extends beyond what you see | Open the cavity and verify the source before rebuilding |
If the item is old, rare, or delicate, the normal rule of “clean it hard” can ruin it. A quick scrub can strip finish, loosen glue, or drive residue deeper. The same goes for electronics. Dry looks are not the same as safe to power on.
For historic or high-value materials, the right move is often less cleaning, not more. That feels wrong to people who want a fast fix. It isn’t. It’s the difference between saving the piece and wrecking its surface.
Quick check: If the item is valuable, fragile, electrical, or tied to hidden damage, standard cleanup is not enough.
How long should drying, cleaning, and repair really take?
Drying, cleaning, and repair should take as long as the material needs, not as long as the schedule wants. Small clean-water events may dry in a day or two; hidden wall or floor damage often takes longer, and repair should wait until the material is actually stable.
Picture this: you want the room back by Friday. I get it. But if moisture is still trapped in the baseboard or under the floor, closing the surface early turns a fix into a second problem.
The timeline changes by material:
- Hard surfaces: can often be cleaned the same day if the source is stopped
- Drywall: may need removal if it swelled, crumbled, or stayed wet
- Wood: needs slow, even drying to reduce warping
- Textiles: need full drying plus odor and residue checks
- Subfloors and cavities: often need the longest drying window
There is no honest universal clock for restoration. Anyone who gives one without looking at the material is guessing.
A sensible timeline usually looks like this:
- Day 0: stop the source, document, remove standing water
- Day 1-2: dry, inspect, and remove irrecoverable material
- Day 2-5: clean surfaces and verify hidden moisture is falling
- After drying: repair, refinish, or reinstall only when stable
- Next few weeks: recheck odor, staining, and surface movement
If the damage is from sewage, heavy smoke, or major flooding, the timeline often extends because sanitation and verification take longer. That is normal. Rushing only creates callbacks.
Quick check: If drying is still active, repair should wait; if the surface is still moving, swelling, or smelling, the job is not done.
FAQ
How do I know if restoration worked?
Restoration worked when the source is gone, the material is dry, the odor is gone or clearly fading, and the surface stays stable over time. If stains reappear, edges lift, or a musty smell returns after a few days, the hidden problem was not fully solved.
Can I just paint over a stain after cleanup?
No, not if the area is still damp or the stain came from active water, mold, or soot. Paint can hide the mark for a while, but it can also trap the problem and make later repairs harder. Seal or paint only after the surface is clean, dry, and stable.
Is bleach enough for mold care?
No, bleach is not enough on many porous materials, and it doesn’t fix the leak or moisture source. It may lighten visible growth on hard surfaces, but the real job is removing the moisture, cleaning the area properly, and replacing materials that can’t be fully restored.
When should I stop doing it myself?
Stop DIY care when the damage is bigger than a small spot, involves sewage or smoke, reaches inside walls or floors, or keeps smelling after drying. Those are signs that the hidden part of the job is larger than the visible one, and that’s where mistakes get expensive.
What is the biggest mistake people make after restoration?
The biggest mistake is closing the area too early. If you rebuild before the structure is dry and clean, trapped moisture or residue can bring back odor, swelling, mold, or corrosion. A finish that looks perfect on day one can still fail in the first 30 days.
Drafted with AI; not yet reviewed by a person.